Daily Dracula X - Stage 3': Release From The Thirst For Blood
May Thy Soul Rest In Peace
After crossing the long bridge, we’re passing through a graveyard and cavern on, presumably, the outskirts of Dracula’s castle. These alternate stages don’t take it easy on you: Quicksand, traps, and tough enemies await.
Music: Cemetery
I’m a little surprised at the directly descriptive title. Yeah, that is where we are. Meanwhile, the stage titles are so poetic…
Scene 1

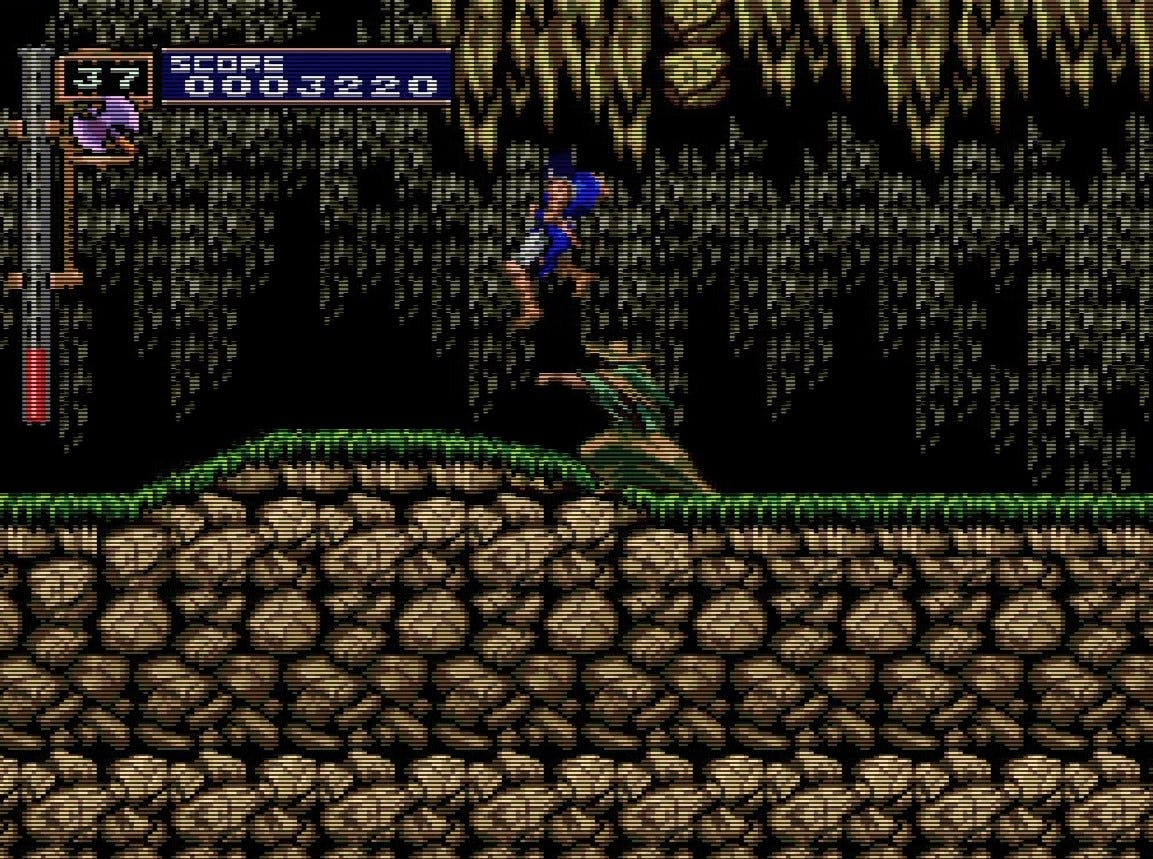
This level’s big hazard is quicksand. Jump to hop your way out of the sand; fall all the way below the screen and die. To make matters worse, mud men form at random inside the quick sand, so you really want to get out of there as fast as possible. Try and make a big jump in and hop out rapidly.
Keep an eye out for the headstones; like the gargoyles we saw earlier, some come to life and attack you, making you wary of the background as well as the foreground.
If you push the headstone on the highest platform all the way to the left, you’ll drop into a secret bonus room inside the rock. All the sub-weapons, an extra life, and a big heart are available here. You’re especially going to want the axe for the next fight.
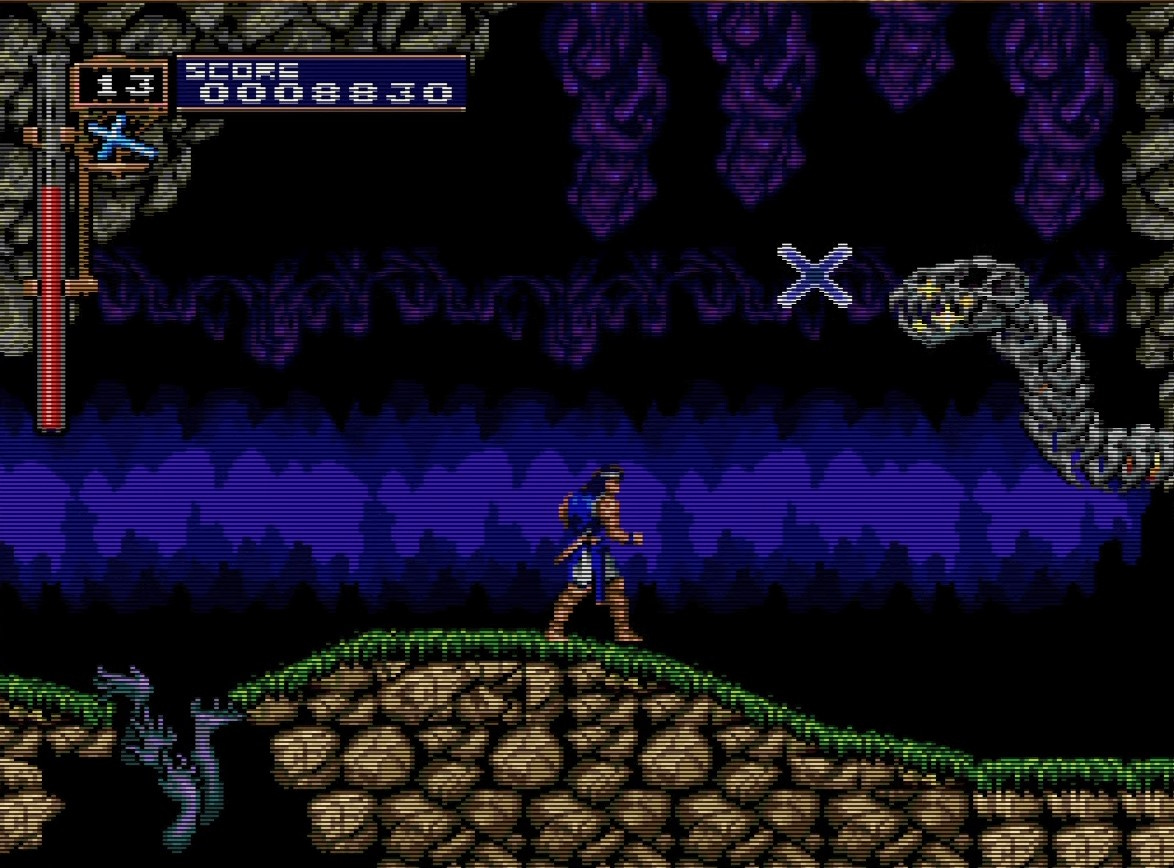
Keep going to meet a flying skull mid-boss. He’s big and intimidating, but once you understand that all you need to do is hit each of his three eyes one time— which is particularly easy with axes— you’ll be able to take him down in seconds.
Rescuing Tera
It’s very easy to miss Dracula’s second hostage. If you go to the next scene through the door, the layout will make it abundantly obvious that you missed a secret route.
At the end of Scene 1, instead of taking that door, take the lower route and smash the wall in, starting from the top brick. You’ll end up at the bottom of the screen by a secret staircase. Take that to rescue the nun Tera.
Unfortunately you won’t see it in this play-through, because the “rescue” scenes only play the first time you reach these rooms. I’ve recorded the cutscene from when I first beat this level using Maria.
In both versions of this cutscene the character you’re using does a “cool pose” at the end in a very anime-style flourish. “I’m such and such… vampire hunter!”1 Characters often say the same things to Maria as they do to Richter, so Maria’s scenes really play as parody.
Scene 2
A long walkway mostly notable for the tough enemy you encounter, the kung-fu-wielding Grave Keeper.
Richter will follow the usual attack and back-off strategy, but when the Keeper attacks he slides forward very quickly. Keep it to one lash and immediately start moving back: when he charges in, jump over or away. If you still have the axe, throw it at a distance. The Keeper’s movements are fast and difficult to predict, so don’t worry if he hits you once or twice.
You can either advance up the stairs or keep going to reach a secret area with a holy water (which will help out way later) and some meat to restore your life. The price is fighting another Grave Keeper.
Belmont secret technique! Moonwalk
You might think this is a trick or glitch the first time you see it, but the moonwalk is a very intentional feature. Hold the attack button down and Richter will slide backwards when you walk that way.
This allows you to walk away from enemies while still facing them, which is a valuable ability when so many of these enemies call for a attack-and-retreat strategy.
Combine with the backflip if you really feel like showing off.
Scene 3

A quick platform jumping sequence where you need to hop over spiked balls and chains. Notable mostly because the alternate path is hiding here.
Attack the chains that the spiked balls are attached to and they’ll fall. Jump down the pit and you’ll fall through a hole in the ground that the spiked ball made when you dropped it.
This alternate path leads directly to the alternate boss, Dogether.
Scene 4
A staircase leads to the next stretch. The hands here will drag you to your death if you touch them, so don’t. There’s a cross here which you should only pick up if you died.

If you made it here with holy water, walk up to the bone dragon and immediately Item Crash. This will kill the enemy and knock down a path to the top area of the level, which will allow you to skip the tough quicksand pit below. On the other hand, you’ll fall into a nasty trap if you miss your jumps up here… which I did, in this run.

Below, you need to sink almost all the way into quicksand to slide under a deadly screw/spike.
In several places here, tombstones are set up to attack you and knock you into the hand pits. Try and swat every tombstone you see, the very moment you see it.
Finally, a bone dragon is positioned to push you back towards a hand pit, so be very careful jumping near him.
The boss of Stage 3’ is, again, the Minotaur.
You’ll see this pose in Smash Brothers Ultimate as well. Mr. Sakurai’s taste is quite excellent, is it not? ↩