Daily Dracula X - Stage 3: The Vengeful King of Bloodshed
An Evil Prayer Summons Darkness
We pass through a church, presumably on the premises of Dracula’s castle. The levels start getting genuinely complex at this point.
This play-through will center on using Richter, I have stated, because Maria is so powerful that the game loses all effort and nuance if you use her. But how do you, the reader, know that if I just say “Maria is too strong, trust me” and then just shelve her?
So in the interest of showing you her power, I’m going to run Stage 3 with Maria. This stage is tough on Richter; it’s long, he has to fight a lot of different, tricky enemies, and there are some tense jumping segments where one false move can ruin your entire run. For Maria, this level is literally cake.
Music: Bloody Tears
Originally from Castlevania II: Dracula’s Curse. Maybe more than Vampire Killer, the essential Castlevania anthem. A high-energy theme song for spooky battles. Endlessly covered, and reprised in so many games in the series.
Scene 1

One advantage to playing as Maria is that I can skip this entire scene. Richter has to walk both ways across a two-floor gauntlet of spear knights and flame-spitting dragon heads.
Maria, on the other hand, can fight her way to the first tall platform, double-jump to the top of the stage, and immediately exit via the stairs. As we say in the fighting game community when we win by shady but legal methods: good game, shake my hand.
Key Enemy: Spear Guard

Here’s another enemy who appears in Symphony and who you’re going to get very acquainted with. Since killing him with Maria is effortless (just shoot the birds out at max range), I’ll talk about him relative to Richter.
You want to get a little bit closer than max whip range, and be very patient about when you press that button. The spear guard has a deflect move that beats a lot of your sub-weapons. When he pulls back a little bit, that means he’s going to attack: get away and counterattack. And repeat!
This enemy has a clever gimmick that comes up a lot in the later stages: if he’s standing above you he’ll stab down at you through the platform. Especially later on, you’ll need to keep an eye out for this to avoid getting skewered.
Scene 2:

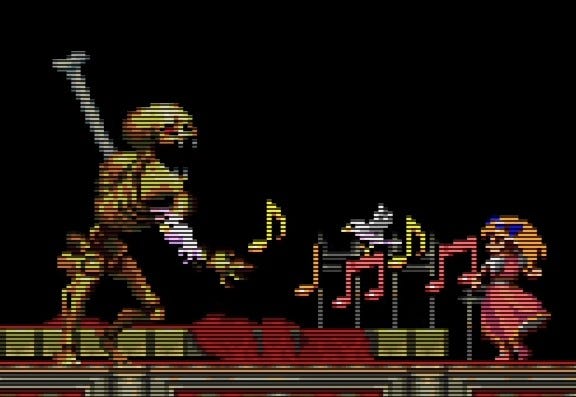
One of the things I love about Castlevania is its totally free-form, wild approach to remixing classical Hollywood horror tropes. For example this room, where you charge through a beautiful church while being attacked by skeletons who are swinging at you from the sky on bone chains, like Tarzan or Spider-Man. It’s oh so simple, but one of my favorite moments in the game.
The skeletons aren’t going to stop coming, so the best approach to this room is to just run through as fast as you can. There’s nothing great in the way of items here either, so just step on it. Let them chase: they can’t catch you.
At the very end there’s a stack of dragon heads. Again, Richter has to actually defeat this enemy: Maria can just double jump over and exit.
If you fall down the pits here, you’ll be dropped at the beginning of the level. That’s a hint for the alternate path.
Scene 3
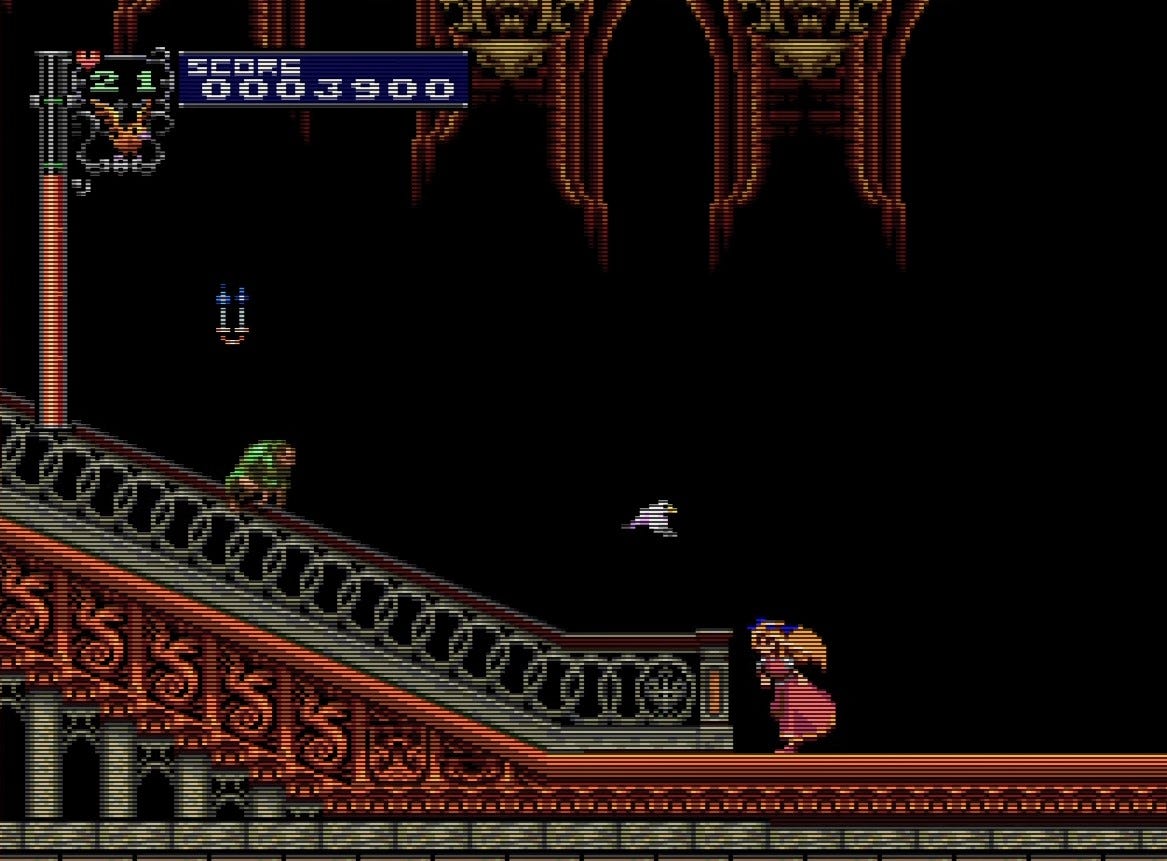
A deceptively difficult area enforces the concept that while big lugs are scary and all, it is the little floating mosquito-like enemies that’ll actually kill you.
Here we have to ascend a staircase while dealing with the hopping Flea Men, who are sliding down the railing. For either character, having a subweapon that hits a large area, or upwards, is very helpful here.
Don’t chase them down: keep a safe distance and let them jump into your attacks.

From here there’s a scene that every Castlevania game is obligated by tradition to feature: hopping over pits while dodging Medusa heads that fly forward in a curved pattern.
Richter would have to tiptoe through this section, crouching or whipping Medusa heads carefully: Maria has a fast weapon and a double jump, so they’re not even real obstacles for her.
The “log” bridges are traps; if you stand on them they’re fine, but if you jump on them they’ll give way and drop you onto this stage’s alternate path.
The problem with that is that this stage’s alternate path does not lead to an alternate boss and thus, it does not lead to Stage 4’. For our purposes, it’s a dead end path.
There is a tiny extra you can get in the next room by striking the statues at the top of the screen until they all turn right: a little bag of cash, good only for points and to unlock Boss Rush videos, will fall from the sky.
There is a bulky skeleton mid-boss here. Rather than get into his rather basic attacks, I’m going to talk about how Maria’s attacks render him dead in seconds. Maria’s birds are basically a pair of double-firing boomerangs. At the edge of her range, they often hit enemies twice. So while one bird doesn’t have the attack power of Richter’s whip, two birds hitting twice is a completely different matter.
In my run, I stand in the right spot and unload on the boss by rapid-firing two bird shots and then immediately launching the music book sub-weapon, and repeating. He stands no chance.
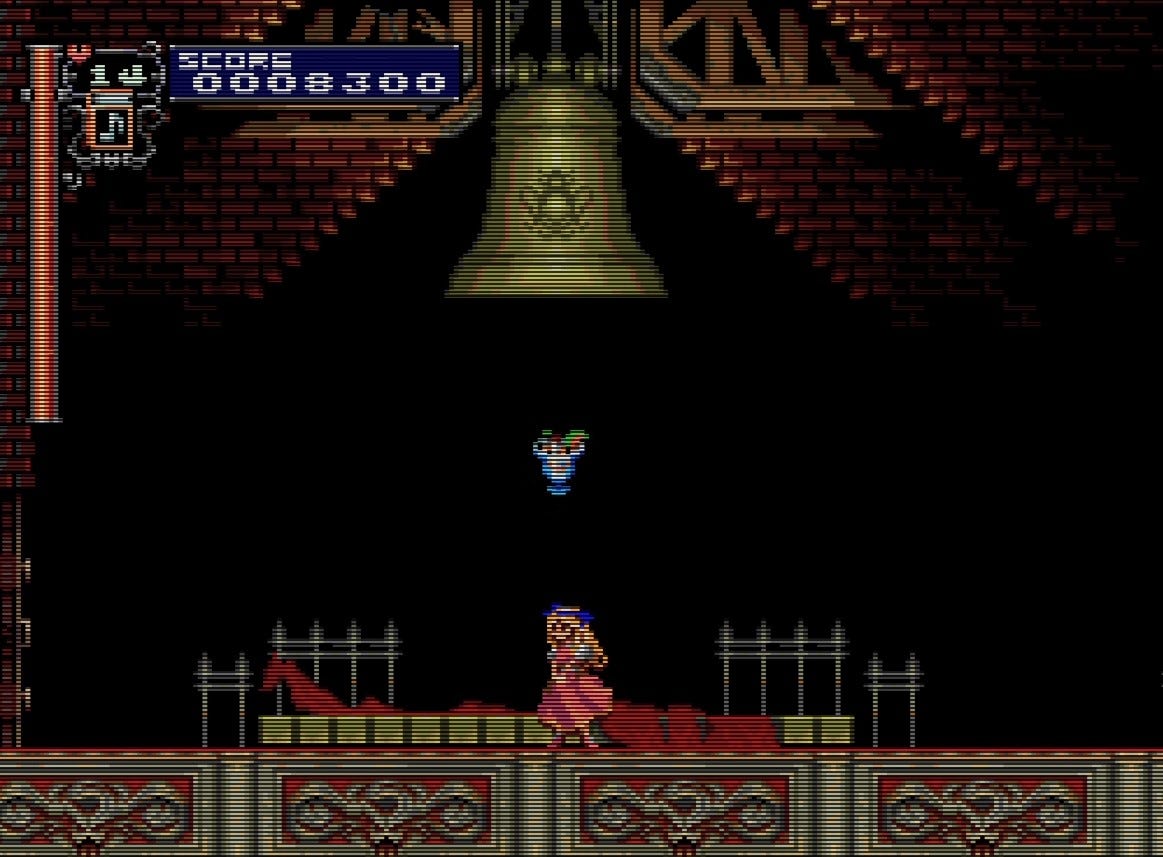
I adore the moment when you defeat this guy where the bell rings and a health item— for Maria a fancy parfait— falls out of it. The Dracula video game should not take itself too seriously.
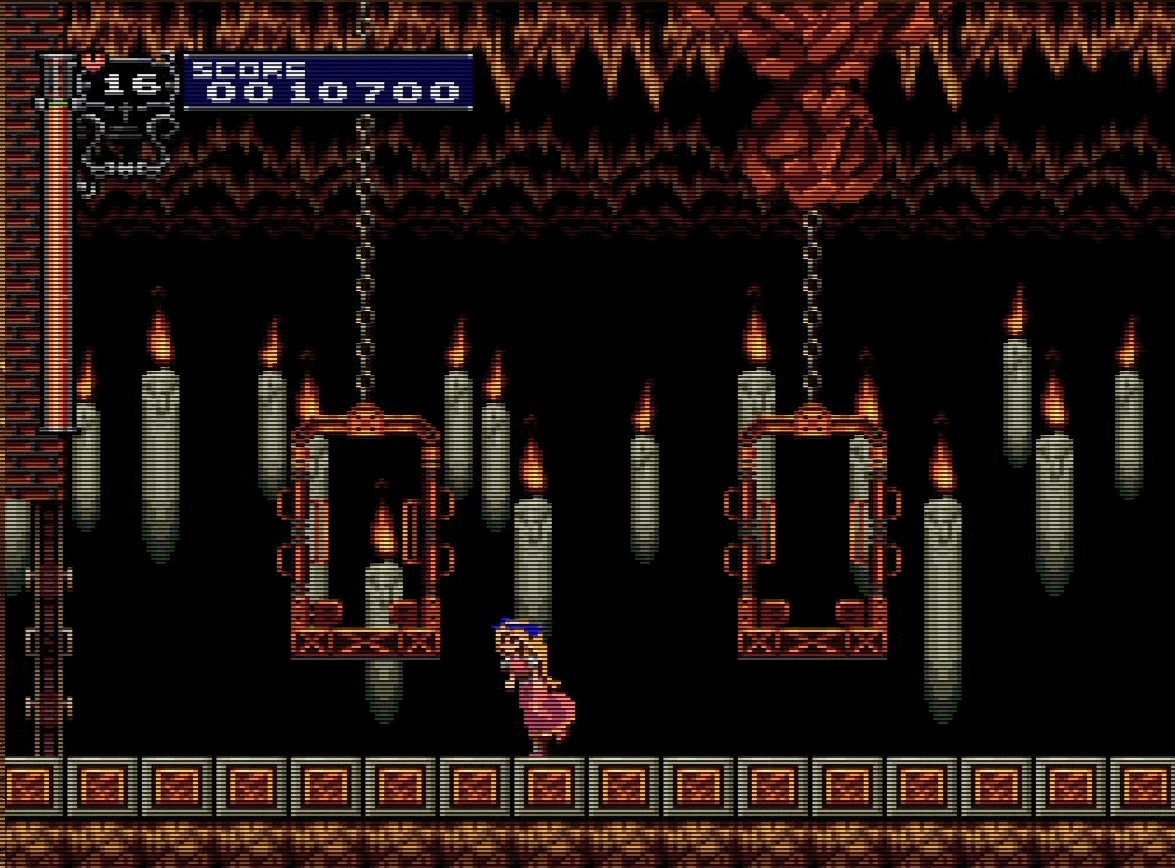
Scene 4
Another tense jumping segment, not least because if you fall in the pits here, you are sent on an alternate path, but not the one you want to be on. You need to make it all the way to the end of this scene without once falling into a pit to get to Stage 4’.
(That’s the other reason I picked Maria for this stage.)
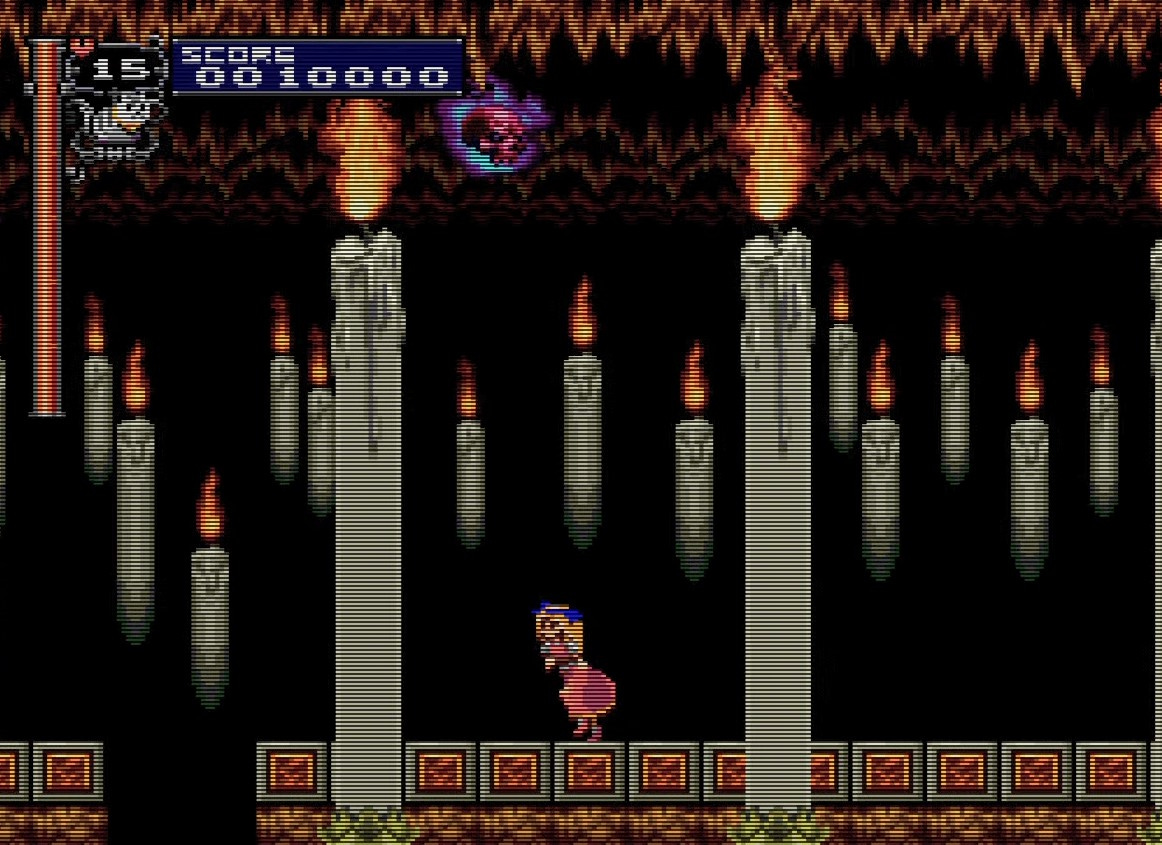
Two flaming purple skulls show up to block your path. Take care of them first to clear the way for your jumps, because if you don’t they’ll definitely interfere.
There’s another tense moment where a Spear Guard is straight ahead after a platform. Take him out as fast as you can: his moves are designed to push you backwards into the pit, so you can’t let him attack.
A delightful touch here is that you can actually knock out the huge candles that foreground the stage, and get items. After all, if you can break tiny candles, certainly the same thing works on gigantic candles.
In the last part of this scene I allow a thief to steal my subweapon (the all-powerful cat) just to show how it works.
The elevator here is your ticket to the alternate boss and to Stage 4’: stand on the left and knock down the rock on the right. But even here there’s a trick; if you’re not careful when you jump to hit the rock, you can fall off the elevator. It’ll just leave without you, buddy. But we’re not going that way yet.
Boss: Minotaur
In the prep room, make sure you get that full-size cake in the left wall. I mean, when do you have the chance? Also note the old corpse seated in a chair at the far end of the room: it’ll dissolve if you touch or attack it.

The minotaur’s another big guy and one of the easiest bosses, rendered even easier by Maria.
With Maria, you want the dragon sub-weapon from the boss prep room. The dragon is simply big, and that’s all you need against the minotaur, who will just run into it over and over again.
The minotaur will charge forward, which is scary, until you start hitting him, which bumps him back. Since Maria can maintain steady fire with the birds and the dragon, she’s in no danger against this boss. Cross under his feet when he jumps high and he can’t touch you.

This boss will also make a final strike in death, charging to one side or the other and hey, was that the Shoryuken from Street Fighter? It was 1993, so the answer is probably “yes”.