Daily Dracula X - Stage 5: The Devil Flies By Night
Toward the Tower of the Final Showdown
From the theme to the level design to the boss, this is my favorite stage of the game. Fight your way through every compartment of a ghost ship, then climb the sail for a rematch against Death.
This is an intense, densely packed stage with difficult enemies, a couple of flashy mid-boss encounters, and a tough boss battle.
Music: Portrait of a Ghost Ship
I always think this one is Op.13, and then it isn’t.
Scene 1
Right away, we start with a scene that you must play precisely according to pattern or otherwise die. The anti-Richter design of this dock is quite remarkable, especially because no sub-weapon is very useful here.
(If you’re having a really tough time with it, this is one of the levels where swapping to Maria might save you a lot of headache.)
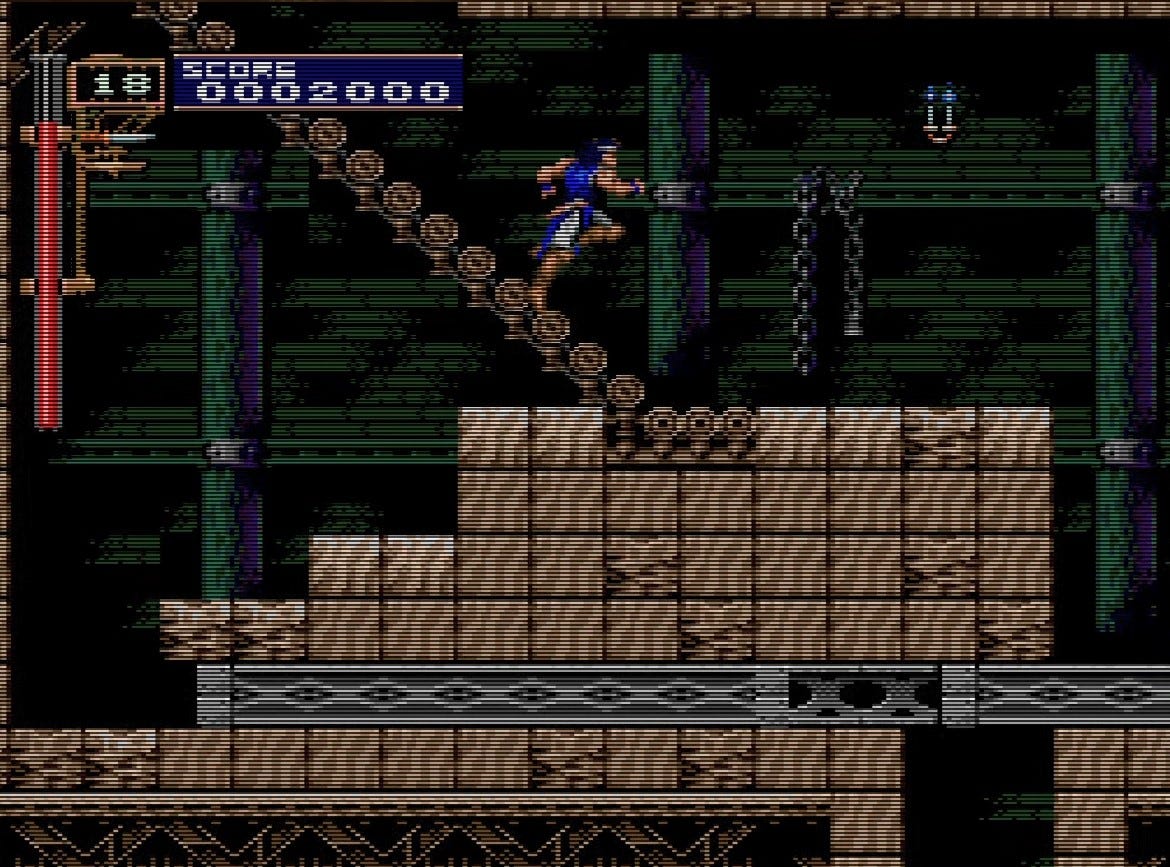
Not only is the platform jumping tough here, so are the enemies. As always in these precarious areas, do not jump unless you are absolutely sure nothing will hit you in the air. It is better to take a hit grounded (from, say, the flying skulls) than to be knocked to your death.
The ball and chain enemies wait a set amount of time and then attack a wide area in front of them. Wait for them to finish attacking while trying to deal with the flying skulls (and this is tough!), then immediately move in and whip them three times.
Against the second ball and chain enemy you need to crouch from the platform and hit him, *while* staying out if his attack range and dealing with the skulls. It’s the hardest part of this segment.
Scene 2
Key enemy! Skull archer
Here we meet the skull archer, who is a little bit smarter than the average undead and as such calls for a very specific game plan. It’s tempting to crouch here, thinking you’re going to duck his arrow. But don’t, because he’ll just crouch to match you and fire a low arrow at you.
Instead, steadily walk towards the archer, whip when you’re in range, and wait for him to shake a bit as he readies his bow. When he does, duck and he’ll fire over your head. Repeat until you’ve got him; it should take three whips.
Scene 3
The fork in the road is here, but we’re going to avoid going to the lower decks of the ship for right now. Pass through this area and deal with a skull archer to encounter a very annoying mid-boss.
Scene 4
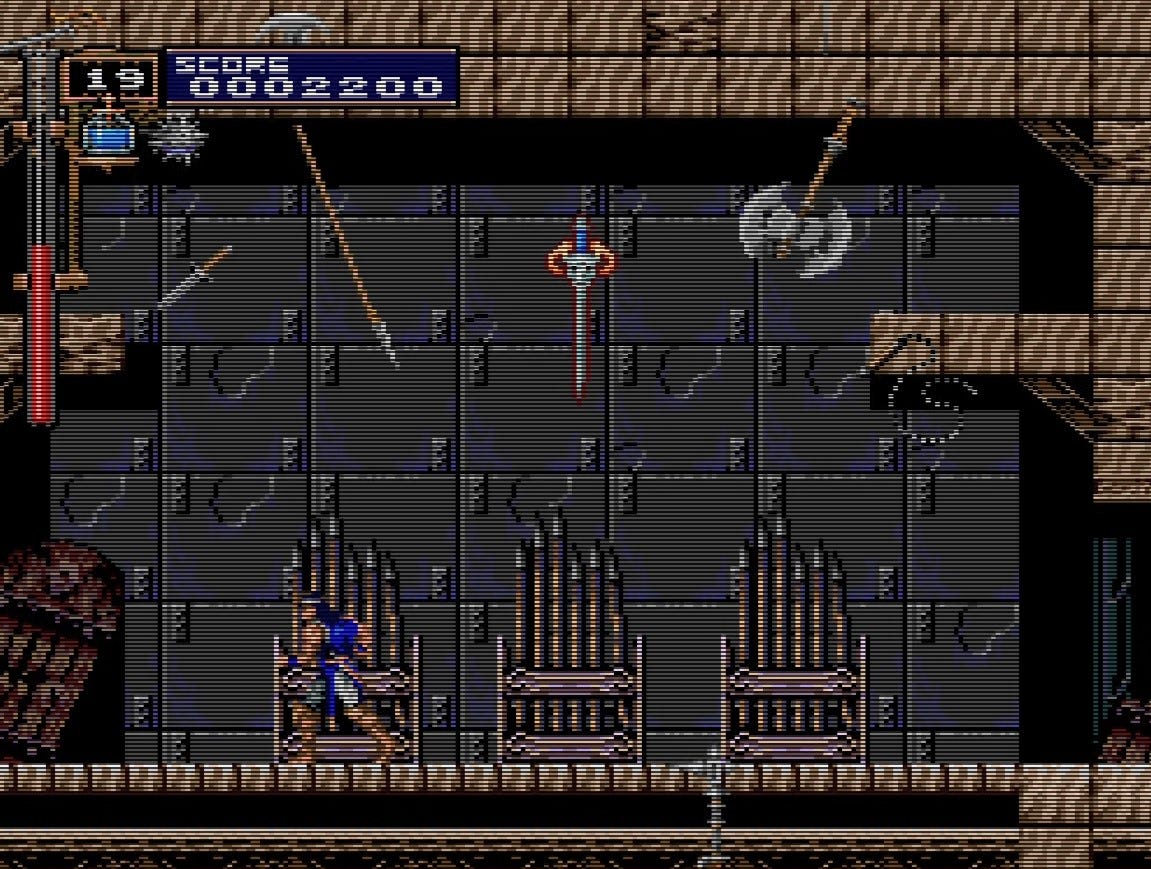
In this room you face off against a possessed armory; swords and whips and axes all flying at you at random. You can whip these weapons to destroy them, but the leader of the pack is the glowing red sword. You won’t be able to leave here until you whip it once.
That doesn’t seem so tough, and sometimes it isn’t. The movement path of the weapons seems to be totally random, and the screen gets very cluttered. Furthermore, your sub-weapons are useless here: they bounce off of the possessed weapons harmlessly.
You need to wait until the glowing red sword flies down low enough that you can whip it, but this is much easier said than done. Wait it out, and try not to take too much damage. There’s no easy way out of this boss; it’s just aggravating.
After this you’ll fight a room full of skull archers one after the other, which should be pretty straightforward if you stay calm and consistent, dealing with them exactly the way you did before.
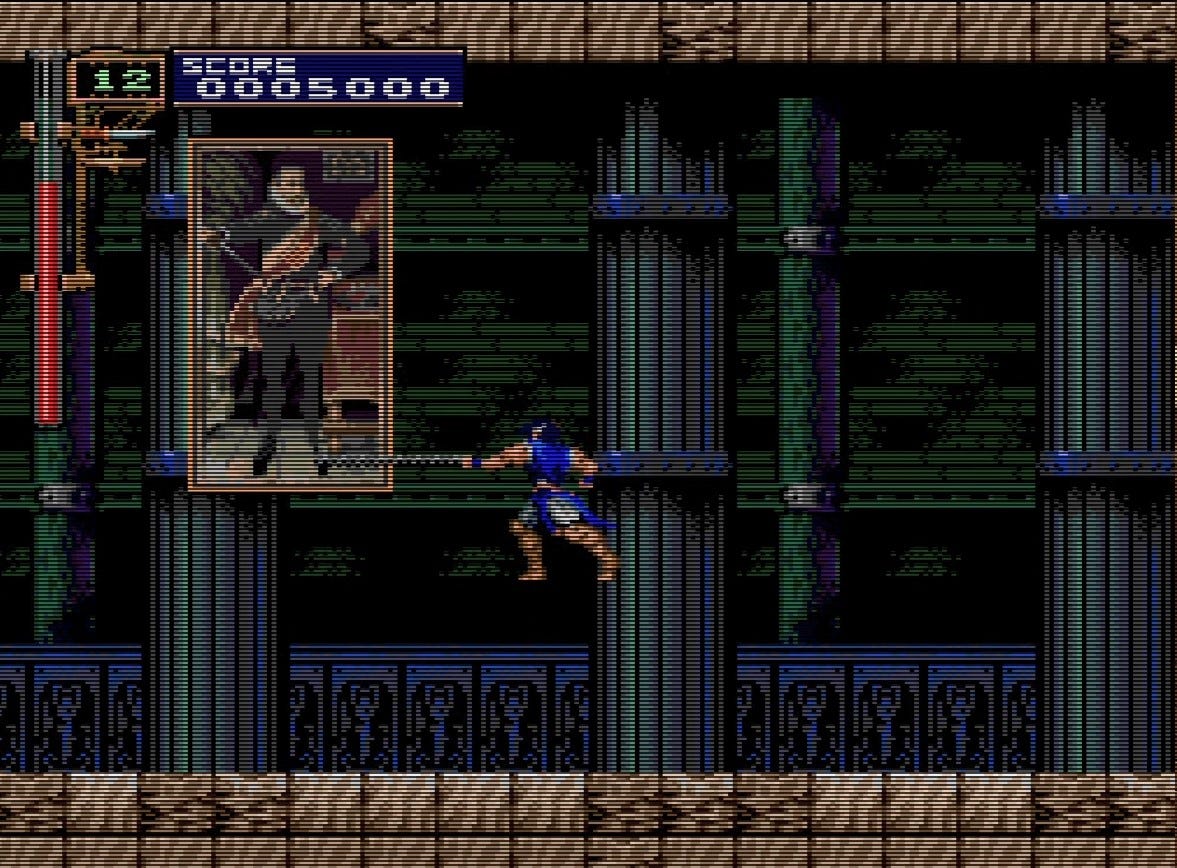
Finally to close out the area, there’s the possessed painting. My run makes this look trivial, and it is if you just jump up and swat him as soon as you can do so.
(There’s also a cool attack animation where the painting sucks your character in and they appear inside the painting, if you don’t mind dying here to see it.)
Scene 5

Note the skull sniper. These guys are pretty simple; it’s really their placement that makes them frustrating. Wait for the sniper to fire, then attack.
Climbing the stairs onto the deck of the ship, you’re going to be faced with more Flea Men riding birds, and some armored big guys who force you to deal with the Flea Men.
Walk all the way right, to the stern of the ship, immediately to get an axe. You have been deliberately starved of a useful sub-weapon on this stage, and you’ll need the axe more than ever for this segment.
Deal with the armored ball-and-chain dudes in basically the same way you dealt with the smaller ones at the beginning of the stage. Move in, whip a couple times, move back. Flying Flea Men complicate matters, so as usual hit them with axes as soon as they appear.
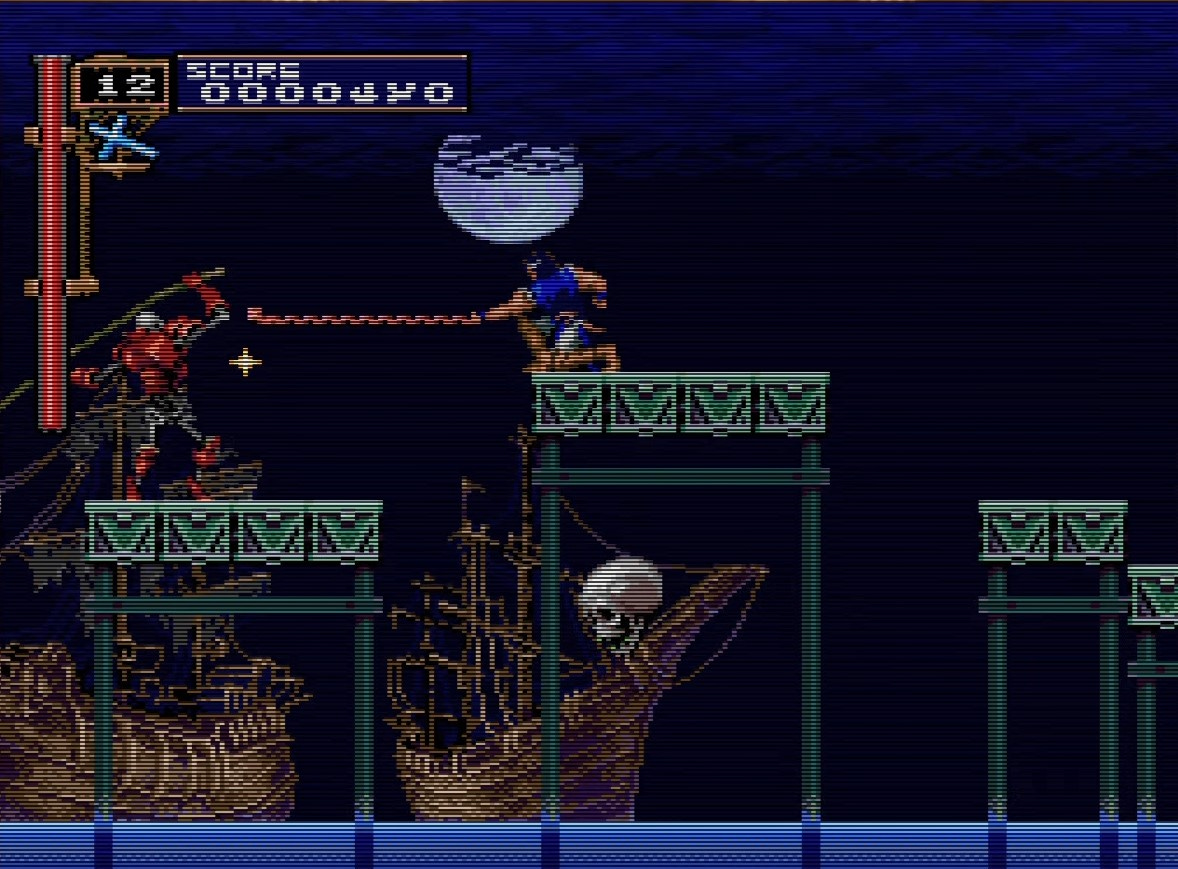
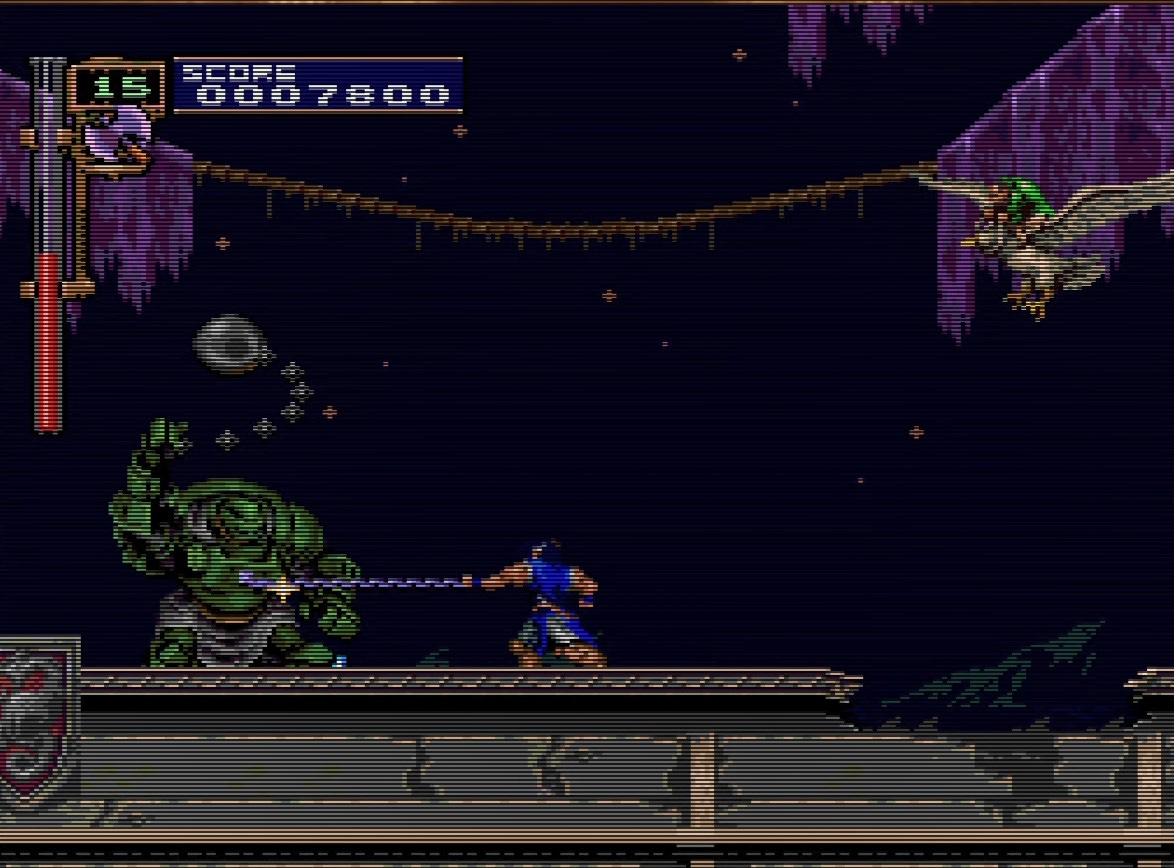
Boss: Death
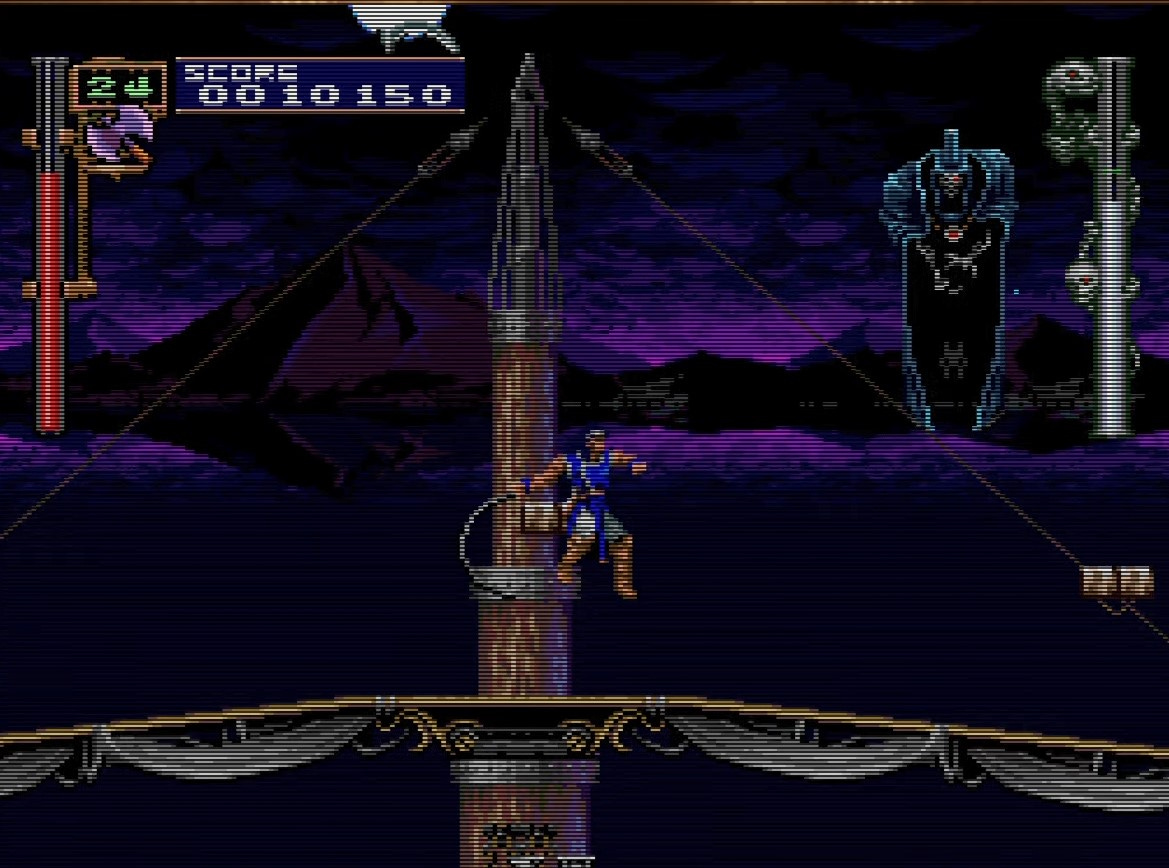
While climbing the mast, you have your choice of weapons for the fight against Death. Though, as ever, the axe is the most practical, the cross isn’t bad either. If you have a lot of hearts built up from the previous section, it isn’t a bad idea to bring the holy water and get a lot of free damage out of using its Item Crash a couple of times.
After making his entrance, Death will fly semi-randomly on the screen, materializing scythes in random positions which fly in your general direction. Not only do you need to hit Death repeatedly, you need to avoid or destroy his scythes.
On top of that, this fight takes place on the sail of a ship, and you need to be very careful you don’t get hit on the edges: Death can and will knock you off the sail and into the ocean for an instant kill.
There’s no easy way out of this: it just takes careful observation and good footwork. Be aware of the flight path of the scythes, move around them, and try and hit Death when he’s in your range. Since he’s flying above, axes are obviously very useful here.
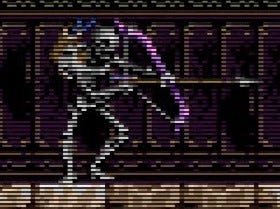
For the second phase, Death will throw off his shroud and get serious. He will always drop in the center of the screen, so don’t be there or you’ll get hit. On the ground, Death will somersault around the stage and attack directly with his scythe, while the smaller scythes from before continue to materialize around you.
Death is invincible for a moment immediately after he attacks— your weapons will fly right through him— so you have to delay your counter-attack a little bit. At a distance, you can safely bop him on the head with your axes. If you made it through the first form, you can definitely make it through the second. Just don’t get sloppy.
Next time we’re going to backtrack on this stage with Maria to reach some spots that Richter couldn’t and take the alternate path through the ghost ship. See you in the engine room, vampire killers!